Thursday, October 7, 2010

Metal Stamping

This metal stamping kit over at Rings &Things is something I'm very tempted to buy. In fact it's currently sitting in my saved shopping cart, along with some stamping blanks, and sheets of metal. So of course by the time I added that along with a few other things I'm now debating about what I should buy based on the cart total. Maybe I'll take some of the blanks out, or hold off on the wire. (I really need to start selling my jewelry to help out with the bead budget - once I'm set to submit all the stuff to the state so I can charge sales tax and all that other good stuff.)

Either way the kit itself isn't that expensive, and contains just about anything one would need to get started metal stamping. Only the sheets of metal and or the stamping blanks are needed. Well, and some oxidizer if one would want to increase the contrast in a stamped piece.

I'll have to post on what I end up deciding. It would be fun to blog about learning in progress of something new like this. Or resin casting. I'm also tempted by the Resin Kit. Though I'm not sure what fumes might be involved with resin. Warm summer open window weather would be a good time to try out the resin kit.

So what new tools/techniques are anyone else thinking about trying out? Yes, I'd like this post to be more then a bunch of links to things I'm deciding on buying. Plus it's always interesting to see what others are thinking of trying.

Saturday, September 25, 2010

Appletini Mini-Lariat

Wrap Around
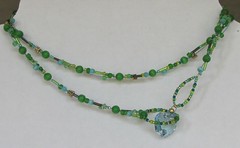
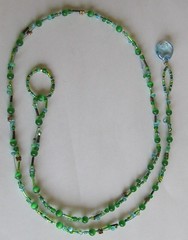
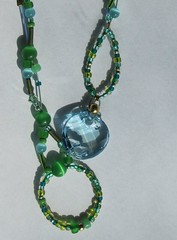
Back in the spring I purchased the Appletini bead mix from Rings and Things to make a miniature lariat. I say mini here because this is only 3 feet long, lariats are usually at least 4 feet. I did also add in a few seed beads from my stash, along with fiber optic beads and Swarovski crystals. The crystal at the end is one of Swarovski's sew on twists.

For the stringing material I used medium49 strand Soft Flex, two different colors. The light blue is from the Tranquility trio, and I think the light green is from the Serenity. I had used two different trios for this necklace.

Aside from the ends of the necklace I used an alternating design to show off the beading wire. The beads look continuous due to the dual strands, but there is exposed wire with a bead or two floating on it. The 6mm green fiber optic beads hold both strands of wire.

Full View Here is what the whole necklace looks like. The exposed beading wire is visible in the larger version of the photograph (clicking the thumbnail leads to the Flickr photo page).


Ends And a picture of what the ends of the necklace look like. I started with the crystal end, joining the two pieces of beading wire then attaching them to the crystal. From there I beaded the loop and the rest of the necklace. For this pattern I worked on both wires together, alternating which one had a floating bead.

Monday, August 23, 2010

Necklace of Reuse

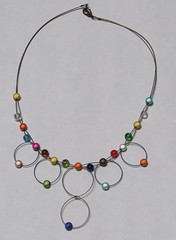
Leftover Necklace In one of my more recent designs I was able to reuse some scraps of Soft Flex I had leftover from other projects. I started this necklace with the loops, using a dark blue for the single ones, and antique brass for the double. The beads on the loops are miracle beads and are all made from my saved pieces of Soft Flex. The main part of the necklace I also used the antique brass color and alternated the miracle beads with glass Czech beads (both are 6mm rounds - I purchased assorted color packs/strands from Rings and Things awhile back).

This one wasn't all that hard to put together once I came up with a design. I started with the loops first, stringing two beads then crimping the loop closed. Once I had the loops finished I doubled up a long piece of Soft Flex so I had the two strands to work with. For the loops the necklace went through one of the beads while I let the other slide to the bottom of the loop. The miracle beads have nice large holes, they even slide over the crimp tubes I used.

So for anyone wanting to share, how have you reused materials leftover? Be they few extra beads, a bit of wire, or other findings.

Wednesday, July 28, 2010

My Mother's Designs - Part 1 Silver Star

The weekend before last my husband went on a guys camping trip and I invited my mother up for a girl's weekend. Mom lives about 100 miles away so I only get to see her so often. She came up on Friday afternoon and stayed until dinner Sunday. We spent two days in the garden and one day with my bead stuff. Mom had two necklaces that she'd been wanting to make, which I helped her with.

The first necklace was one to complement a glass pendant she had purchased at a local festival. One of the previous times she was visiting she purchased these fun clear peanut shaped beads. The tricky part of the beads is that the stringing material had to be chosen very carefully. We had strung a few of these beads on various colors of beading wire I had handy, but everything looked to dark. With the silver colored bail on the pendant, and the silver colored stars Mom bought we knew something silver would be the way to go.

So when she came up we stopped by the bead store and I bought a spool of sterling silver SoftFlex (the .019 thickness). It worked out perfectly for the necklace. She had also picked out some Swarovski crystals for the design. Mom figured out the placement of everything, I only helped with the crimps.

The full necklace, with it's mix of crystal and metal.

Closeup of part of the necklace, this shot shows off the peanut beads nicely. Depending on the way the light is hitting them more or less of the silver beading wire shows through.

Materials: the beads, silver colored stars, and the smaller crystals came from the local bead store. The crystal stars (also Swarovski) I ordered from Rings and Things. As previously mentioned this is strung on SoftFlex Extreme Sterling Silver wire .019 diameter with 19 strands.

Because this post is getting long I'll have the other necklace in it's own post.

Thursday, July 8, 2010

Update

Quick post is quick. With this heat and humidity we are having right now it is hard to concentrate on putting together a fuller post. (I have no AC at home - then again our summers here are usually pretty reasonable).

Item 1 - Blog Partner: Rings and Things updated their blog partners, and I'm on the list now. I uploaded the badge on my blog earlier today. I was all excited when I read the e-mail. Now I'll have to stick the FTC compensation blurb in a draft post so it's handy if my name is drawn for a goodie bag.

Item 2 - New Bracelet: I also wanted to show off a bracelet I made last week, that I can see being worn in the fantasy novel I'm working on. I wrote up a post about how the bracelet ties in over at my writing blog, and here is the bracelet: (thumbnail linked to Flickr)
Spiral Bracelet I used size 6 seed beads, the small coils are made of 20 gauge copper wire while the large one is 12 gauge aluminum. The small spirals are attached to looped spacers I bought awhile back at Rings and Things.

Sunday, July 4, 2010

Storage again

This post is a little overdue. Two weeks ago I went shopping at Target for general storage (as in non-bead related) totes. As I was putting my list together I figured it might be nice to have a bigger storage tote/unit that I could put some of my bead stuff in. After some thinking, I decided to see if I could find a Sterilite rolling drawer cart that could work. I already have one at home for other things, but that one the drawers are to short to stand up my Beadalon organizers. Before leaving I measured the bead organizers, and made marks on my list so I could check the drawers at the store.

I did find a drawer-cart that works. The bottom drawer is really tall while the other two are shorter. The bottom is a nice size for the bead organizers (which with their individual sealed compartments can be stored standing up instead of stacked on each other), I'll be able to fit several more in easily. The top two drawers are good for my random smaller containers, like my tools, my crystal container, and other miscellaneous ones.

I'm not going to worry about fitting all my beads in the drawer-cart. I have my Bead Buddy lap desk/storage guy on it's own, along with my Sterilite bin with my stacked round containers. But along with my bead board, I really only have 3 bigger storage containers for my beads, instead many random smaller ones floating around. A tip on the drawers, with the cart I got the bottom drawer is tall enough to fit hanging file folders. It has little plastic 'rails' on the sides for this purpose. If anyone else is interested in using a drawer cart, this is a handy way to check for the height needed with the Beadalon organizers.

Sorry for the picture heavy part, but I thought it might be useful to show how I fit stuff in here. (Which is still a work in progress).

Monday, June 21, 2010

More bracelets

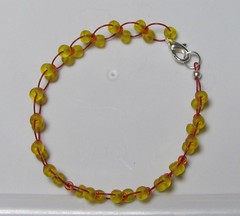
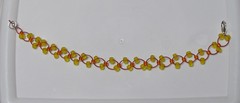
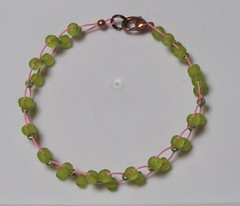
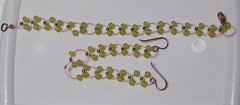
In my more recent online ordering I bought more Soft Flex beading wire. I picked out another trio and a few single spools. For these bracelets I used seed beads, and crystals. The large seed beads are size 6 while the small ones are 8. The funny thing is, some of my 8s have bigger holes than other 8s. For some of my beads it was snug getting the two strands through an 8 while others there was enough space for another strand.

Anyways, here is what I made having fun with a loop pattern to show off the color combination of the beads and stringing wire. The translucent matte seed beads make me think of those "jelly" shoes / sandals that used to be popular when I was younger.

Warm summer nights:
.

.

Spring Blossoms: (bracelet, and earrings)

.

.

Sparkle:
This is the first one of these loop designs I tried out, and I hadn't used enough Soft Flex. Instead of restringing it and having a random piece of wire, I decided to work the design differently. This is a fun piece to wear with the loopy crystals and the contrasting seed bead strands.
.
The crystals on this one are Swarovski, 6mm bicone. I also used copper bicone beads from Rings and Things in this bracelet.