Sunday, December 12, 2010

Gemstone Necklace

I got the idea for this necklace from my Bead Journey book (ISBN 978-0-87116-267-0) which I modified slightly. I had been wanting to do more work with stones, and this was a nice opportunity to do so.


(Both images are scaled down for this post). My camera was running low on batteries so I ended up taking quick shots, and luckily a few came out alright. It didn't help that it was snowing last week so I didn't have to much natural light to work with.

Supplies:
All the stones are Sodalite:
Pendant is - 20x39mm Puffed Marquise
Rest of stones necklace earrings - 6mm Rondelles 
Spacer 1 - 4mm Glass Disk -Aquamarine
Spacer 2 - 4mm Filigree - Antiqued Copper Plated
Eye pin and earring findings are from a kit my mom gave me last year as a gift.
Strung on Bone Soft Flex 49 strand (Via a Trio Pack)

When I was planning this necklace I had decided to use the glass spacers in place of the gold ones from the design in the book. As I was sorting through my order I realized how nice the filigree beads looked with the stones. I debated using the filigree instead of the glass and spent a bit of time looking at strung samples. I decided that I liked the way the glass picked up the light while nestled between the stones and decided to alternate the spacers.

If anyone else wants to try this design it's best to put the marquise stone on a head/eye pin. My first attempt I strung it with the beads and it kept shifting sideways due to it's shape interacting with the beads. Though a top drilled marquise would be alright to string directly with the beads.

Monday, November 8, 2010

Fall Necklace

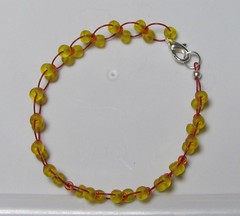
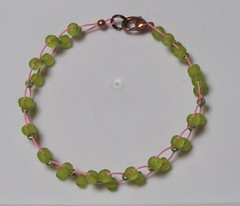
 I made this set awhile back and finally got a chance to upload the images. The necklace is choker length and the bracelet is about 6 and a half inches long. I used 6mm translucent Czech glass beads, 4mm Swarovski crystals. The crystals are light topaz, moonlight, crystal copper, and fire opal. The glass beads are orange and dark topaz. These are both strung on medium Soft Flex, the red from my sophisticated trio. I also made the extenders from a spool of chain I bought from Rings and Things. I like being able to make my extenders rather than always using the pre-made ones. This is another version of my double stranded beading wire designs.

(And ya, the formatting on this post is weird - it's tricky working with the post editor on my netbook. Only so much screen space and no mouse. Though blogging away from my desktop is nice.)

Saturday, October 30, 2010

Rings & Things Fall Supplement

I received my Fall Supplement catalog recently and there is some great new items within it's pages. Another nice thing about the catalogs are the design ideas intertwined in the pages along with the products.

Out of all the new items it was hard to choose what interested me the most. But the Alcohol Inks caught my eye. These are designed for non-porous surfaces, like metal, and glass. These look like they would be a wonderful way to add a creative touch to a piece. I'm probably going to buy the metal stamping kit I blogged about previously so these would work well with that.

The website has a handy category for September new items and October new items. What do you think looks like it would be fun to use?

Thursday, October 7, 2010

Metal Stamping

This metal stamping kit over at Rings &Things is something I'm very tempted to buy. In fact it's currently sitting in my saved shopping cart, along with some stamping blanks, and sheets of metal. So of course by the time I added that along with a few other things I'm now debating about what I should buy based on the cart total. Maybe I'll take some of the blanks out, or hold off on the wire. (I really need to start selling my jewelry to help out with the bead budget - once I'm set to submit all the stuff to the state so I can charge sales tax and all that other good stuff.)

Either way the kit itself isn't that expensive, and contains just about anything one would need to get started metal stamping. Only the sheets of metal and or the stamping blanks are needed. Well, and some oxidizer if one would want to increase the contrast in a stamped piece.

I'll have to post on what I end up deciding. It would be fun to blog about learning in progress of something new like this. Or resin casting. I'm also tempted by the Resin Kit. Though I'm not sure what fumes might be involved with resin. Warm summer open window weather would be a good time to try out the resin kit.

So what new tools/techniques are anyone else thinking about trying out? Yes, I'd like this post to be more then a bunch of links to things I'm deciding on buying. Plus it's always interesting to see what others are thinking of trying.

Saturday, September 25, 2010

Appletini Mini-Lariat

Wrap Around
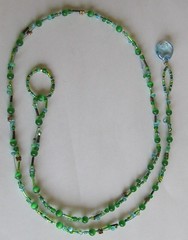
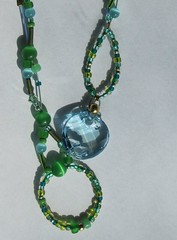
Back in the spring I purchased the Appletini bead mix from Rings and Things to make a miniature lariat. I say mini here because this is only 3 feet long, lariats are usually at least 4 feet. I did also add in a few seed beads from my stash, along with fiber optic beads and Swarovski crystals. The crystal at the end is one of Swarovski's sew on twists.

For the stringing material I used medium49 strand Soft Flex, two different colors. The light blue is from the Tranquility trio, and I think the light green is from the Serenity. I had used two different trios for this necklace.

Aside from the ends of the necklace I used an alternating design to show off the beading wire. The beads look continuous due to the dual strands, but there is exposed wire with a bead or two floating on it. The 6mm green fiber optic beads hold both strands of wire.

Full View Here is what the whole necklace looks like. The exposed beading wire is visible in the larger version of the photograph (clicking the thumbnail leads to the Flickr photo page).


Ends And a picture of what the ends of the necklace look like. I started with the crystal end, joining the two pieces of beading wire then attaching them to the crystal. From there I beaded the loop and the rest of the necklace. For this pattern I worked on both wires together, alternating which one had a floating bead.

Monday, August 23, 2010

Necklace of Reuse

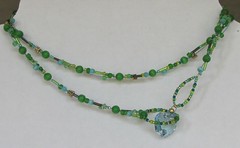
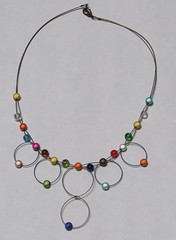
Leftover Necklace In one of my more recent designs I was able to reuse some scraps of Soft Flex I had leftover from other projects. I started this necklace with the loops, using a dark blue for the single ones, and antique brass for the double. The beads on the loops are miracle beads and are all made from my saved pieces of Soft Flex. The main part of the necklace I also used the antique brass color and alternated the miracle beads with glass Czech beads (both are 6mm rounds - I purchased assorted color packs/strands from Rings and Things awhile back).

This one wasn't all that hard to put together once I came up with a design. I started with the loops first, stringing two beads then crimping the loop closed. Once I had the loops finished I doubled up a long piece of Soft Flex so I had the two strands to work with. For the loops the necklace went through one of the beads while I let the other slide to the bottom of the loop. The miracle beads have nice large holes, they even slide over the crimp tubes I used.

So for anyone wanting to share, how have you reused materials leftover? Be they few extra beads, a bit of wire, or other findings.

Wednesday, July 28, 2010

My Mother's Designs - Part 1 Silver Star

The weekend before last my husband went on a guys camping trip and I invited my mother up for a girl's weekend. Mom lives about 100 miles away so I only get to see her so often. She came up on Friday afternoon and stayed until dinner Sunday. We spent two days in the garden and one day with my bead stuff. Mom had two necklaces that she'd been wanting to make, which I helped her with.

The first necklace was one to complement a glass pendant she had purchased at a local festival. One of the previous times she was visiting she purchased these fun clear peanut shaped beads. The tricky part of the beads is that the stringing material had to be chosen very carefully. We had strung a few of these beads on various colors of beading wire I had handy, but everything looked to dark. With the silver colored bail on the pendant, and the silver colored stars Mom bought we knew something silver would be the way to go.

So when she came up we stopped by the bead store and I bought a spool of sterling silver SoftFlex (the .019 thickness). It worked out perfectly for the necklace. She had also picked out some Swarovski crystals for the design. Mom figured out the placement of everything, I only helped with the crimps.

The full necklace, with it's mix of crystal and metal.

Closeup of part of the necklace, this shot shows off the peanut beads nicely. Depending on the way the light is hitting them more or less of the silver beading wire shows through.

Materials: the beads, silver colored stars, and the smaller crystals came from the local bead store. The crystal stars (also Swarovski) I ordered from Rings and Things. As previously mentioned this is strung on SoftFlex Extreme Sterling Silver wire .019 diameter with 19 strands.

Because this post is getting long I'll have the other necklace in it's own post.

Thursday, July 8, 2010

Update

Quick post is quick. With this heat and humidity we are having right now it is hard to concentrate on putting together a fuller post. (I have no AC at home - then again our summers here are usually pretty reasonable).

Item 1 - Blog Partner: Rings and Things updated their blog partners, and I'm on the list now. I uploaded the badge on my blog earlier today. I was all excited when I read the e-mail. Now I'll have to stick the FTC compensation blurb in a draft post so it's handy if my name is drawn for a goodie bag.

Item 2 - New Bracelet: I also wanted to show off a bracelet I made last week, that I can see being worn in the fantasy novel I'm working on. I wrote up a post about how the bracelet ties in over at my writing blog, and here is the bracelet: (thumbnail linked to Flickr)
Spiral Bracelet I used size 6 seed beads, the small coils are made of 20 gauge copper wire while the large one is 12 gauge aluminum. The small spirals are attached to looped spacers I bought awhile back at Rings and Things.

Sunday, July 4, 2010

Storage again

This post is a little overdue. Two weeks ago I went shopping at Target for general storage (as in non-bead related) totes. As I was putting my list together I figured it might be nice to have a bigger storage tote/unit that I could put some of my bead stuff in. After some thinking, I decided to see if I could find a Sterilite rolling drawer cart that could work. I already have one at home for other things, but that one the drawers are to short to stand up my Beadalon organizers. Before leaving I measured the bead organizers, and made marks on my list so I could check the drawers at the store.

I did find a drawer-cart that works. The bottom drawer is really tall while the other two are shorter. The bottom is a nice size for the bead organizers (which with their individual sealed compartments can be stored standing up instead of stacked on each other), I'll be able to fit several more in easily. The top two drawers are good for my random smaller containers, like my tools, my crystal container, and other miscellaneous ones.

I'm not going to worry about fitting all my beads in the drawer-cart. I have my Bead Buddy lap desk/storage guy on it's own, along with my Sterilite bin with my stacked round containers. But along with my bead board, I really only have 3 bigger storage containers for my beads, instead many random smaller ones floating around. A tip on the drawers, with the cart I got the bottom drawer is tall enough to fit hanging file folders. It has little plastic 'rails' on the sides for this purpose. If anyone else is interested in using a drawer cart, this is a handy way to check for the height needed with the Beadalon organizers.

Sorry for the picture heavy part, but I thought it might be useful to show how I fit stuff in here. (Which is still a work in progress).

Monday, June 21, 2010

More bracelets

In my more recent online ordering I bought more Soft Flex beading wire. I picked out another trio and a few single spools. For these bracelets I used seed beads, and crystals. The large seed beads are size 6 while the small ones are 8. The funny thing is, some of my 8s have bigger holes than other 8s. For some of my beads it was snug getting the two strands through an 8 while others there was enough space for another strand.

Anyways, here is what I made having fun with a loop pattern to show off the color combination of the beads and stringing wire. The translucent matte seed beads make me think of those "jelly" shoes / sandals that used to be popular when I was younger.

Warm summer nights:
.

.

Spring Blossoms: (bracelet, and earrings)

.

.

Sparkle:
This is the first one of these loop designs I tried out, and I hadn't used enough Soft Flex. Instead of restringing it and having a random piece of wire, I decided to work the design differently. This is a fun piece to wear with the loopy crystals and the contrasting seed bead strands.
.
The crystals on this one are Swarovski, 6mm bicone. I also used copper bicone beads from Rings and Things in this bracelet.

Wednesday, June 2, 2010

Bracelets

Quick post of quick posting, I mostly wanted to show off some more recent bracelets I made (about a month ago). I still have to photograph my most recent stuff (really fun strung bead floating bracelets).

I used Flickr for the images - so click the thumbnails to go to the Flickr item pages, and the "all sizes" icon to see the largest view.

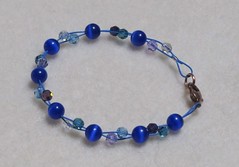
Bracelet 1 - Soft Flex, with crystals and cats eye beads:
Blue Bracelet.
I doubled the stringing wire to get that design. I'd originally wanted to use all crystals, but the ones I have on hand wouldn't fit 2 strands of the wire through. But I like the look of the cats eye with the crystals.

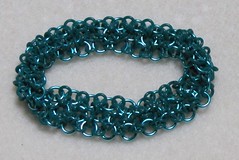
Bracelet 2 - Chainmaille stretch
Japanese 6 in 1 Maille
For this bracelet I used a Japanese 6 in one design, the smaller rings being rubber. The rubber rings are small, but they have enough stretch so this bracelet doesn't need a clasp. This bracelet is one continuous piece of weave, which kind of shows up in the photograph. It gets a bit tricky to join the ends together since only the larger rings can be opened.

Wednesday, May 19, 2010

Working something out

Awhile back I purchased a glass locket pendant from Rings and Things. When I had ordered it I had in mind making polymer clay discs to place in it (which I still might try). But when it came I had fun picking through my bead stash and trying out different things inside it.

The large pink bead is a 10mm glass fiber optic 'cat's eye'. Because that bead is larger than most of the locket, it floats in the center section where the glass is curved out. I think it lends for a neat effect.

I also have some seed beads in there. While they add some interest I don't think I will keep them in there. See, the locket opens, and it's easy enough for these to fall out being as small as they are. I've already picked them up once or twice while playing with the pendant.

So yes, short post is short, but I wanted to show a little work in progress.

Monday, May 3, 2010

Earrings with Beading Wire

Earrings 
 (Click image for larger version)
Earrings are something fun to make, especially when I have random extra beads leftover. This weekend I made a bunch of earrings, using bead stringing (beading) wire instead of headpins or regular wire. These are all made with Soft Flex brand, using their Trios packs (3 colors sold together). Most of these I used the Tranquility pack, and a little bit of the Serenity pack.

Bead wise I used a variety of beads. The large dark blue ones are resin, which I picked up awhile back at my local JoAnne's. The other blue beads, both light and dark are glass fiber optic "cat's eye" beads, which I purchased at Rings and Things. I also used some Swarovski crystals which I've purchased from both Artbeads and Rings and Things.

Finding wise the lever backs I purchased from Artbeads, and the colorful French hooks I bought from Rings and Things. The French hooks are niobium, a metal which people with nickel allergies can wear. Though buying the niobium findings is also nice because of the variety of colors available.

These were really easy to make, and would be a great project for someone learning to bead, or anyone really. It's also a good opportunity to practice using crimps. For most of the pairs I simply looped a length of stringing wire through the earring finding, folding it in half. I then slid a larger  bead on both strands and up to near the earring. To keep this bead from sliding down I used a crimp underneath. Then I put various beads on the bottom of each strand.

Saturday, April 24, 2010

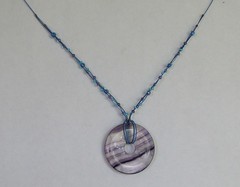
Soft Flex Tranquility Necklace

I finally got around to photographing a necklace I made about a week and a half ago:
Purple and Blue

This is the necklace I had made when I posted about the various numbers of strands of Soft Flex that could be strung through seed beads. I used the Tranquility trio pack (shades of blue) for this design along with various blues and purples of seed beads.

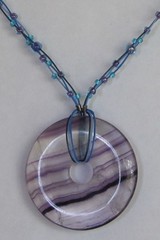
Pendant of Purple

The design started with the pendant, which was a gift from my mom awhile back. I'd first wire wrapped it with coiled wire which I wasn't to happy with. Then after I had picked out the Soft Flex blue beading wire I figured that would work well with this pendant.

Closeup Wires

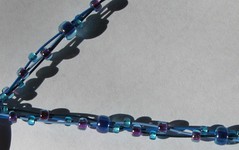
Here is a closeup of the strands of beading wire with the beads. The little blue beads are size 11 and fit over one strand. The purple lined blue beads are size 8 which fit over two strands. And finally, those large dark purple/blue beads are size 6 aka "E beads" and fit over all three strands.

Note on the images: I used my Flickr account for these, clicking the images will take you to the picture's own Flickr image page. If you want to see the image full size, click the "all sizes" icon above the picture. It should default to full size, but if not click on "large".

Materials:
Stringing wire - Soft Flex Tranquility .019 inches in diameter
Crimp tubes - Size 2 base metal variety pack
Size 11 beads - ToHo Silver lined dark aqua
Size 8 and 6 beads - Most likely ToHo's as well, I've had these in my supplies awhile.
Pendant - Glass doughnut, was a gift.

Friday, April 16, 2010

Bead strining wire and seed beads

Yes, no pretty picture for this post, and it's a short one to boot. Sorry about that.

Anyways, I recently was stringing three stranded necklace with a pendant and seed beads. I used different sizes of beads which gave the necklace a fun look. I figured it would be good to share how many strands could fit through the various bead sizes, which is handy to keep in mind while planning a design. Especially if you would need to buy supplies. (Having stuff on hand it is easy enough to quickly check what fits).

For the stringing material I was using Soft Flex, their Tranquility trio. The wire has 49 individual strands and is 0.019"(0.49mm) diameters thick.

For the seed beads I was using my current supplies, and I'm pretty sure all of them are Toho brand (the 8 might not have been).
Size 11 bead - fits 1 strand of stringing wire
Size 8 bead - fits 2 strands of stringing wire
Size 6 (aka "E") bead - fits 3 strands, with a bit of wiggle room.
(For seed beads the larger the number, the smaller the bead)

With the design I have all three strands holding the pendant, and aside from by the pendant and to finish the ends, I didn't use any crimps. The strands themselves I strung through various numbers of beads *points up*.

Thursday, April 15, 2010

New look soon

Quick post of posting. Pretty much I've been thinking about giving this blog a makeover to move away from the Blogger template (the dots do make me think of beads though) and have something that fits me and this blog. Maybe next week I'll start working on something, which might make for some interesting colors/fonts while I'm in the process of updating. At least I have an old private blog I can test stuff on.

I started with my writing blog, seeing as how I already had some graphics to work with from my writing web site. Not that I'm going to go to graphic heavy, but I do want to have something fun.

Friday, April 9, 2010

Goodies!

Well, the order I placed Wednesday afternoon over at Rings and Things arrived in the mail today and I'm all excited. There's nothing quite like the rush of playing around with various bead and findings letting design ideas run through my head. I figured I'd post about some of the fun stuff I picked out, rather than tweeting about every last thing in my excitement. ("Cabs" and "Bezel" and such are probably unknown words to my non-bead followers on Twitter).

Of course I had to try out the Bezel Lace first. I bought the half circle one as it was a good fit for the size of the cabochons (cabs) I bought awhile ago. I cut a piece with my wire cutters, and pushed it around a cab to shape. Then I used my chain nose pliers to bend the lager circles for the back of the cab, and slightly bent the smaller ones to fit the front. I still have to wire wrap the top loops to close it, but it looks like it will be a perfect fit. It was fun to work with, and it looks really great with the cab.

I also bought some Soft Flex Trios bead stringing wire the Tranquility pack. Trios are packs of three different colors, which is nice to expand the colors I have on hand. Tranquility is various blues; tanzanite, lapis, and blue topaz. So far I've only opened the packaging on these, but it's enough to see how nice the colors are.

I also bought various beads, which I'm starting to get some design ideas. Part of me thinks it would be fun to blog about the design process as I'm working on it, then post some in progress pictures as I get to the assembly stage. But some of the beads I bought are for gifts, and contests, so I wouldn't want to ruin any surprises. Though maybe I could do something with the cab, or the glass memory-box style pendant would be cool to. I have a few ideas what to put inside it.

Wednesday, March 31, 2010

Because I like where I shop

Work in Progress Ever ask someone where they purchased a particular component of piece of art they put together and gotten a vague or non response? That's happened to me once or twice that I remember, and I find it annoying. As an artist buying components to a piece I'm working on is only the start. Where my creativity comes in is how I decide to use said components, and how well I can put that design together. It's a combination of design and craftsmanship that carries a piece of jewelry, or other handcraft. And yes, design includes choosing which components to use.

When I post my creations on my blog, or various online communities, I like to cite my sources of the materials I used. I may not always be good about naming my supplier specifically, but I like to give enough information so anyone interested could buy similar parts. Well, when it comes to my blog, I do have a blog roll feature for the blogs of the businesses I buy from. I don't like to buy into the mindset of "if they know where I got X Y and Z then they'll copy my super cool design". On the flip side I'm not naive enough to think that design copying doesn't exist either (but that's not really the topic of this post).

When it comes to the level of transparency one has about their suppliers there is a point I do want to make. When you tell people where you buy your supplies, then they can also buy from your supplier(s), increasing the sales your supplier makes. And when your supplier sells more stuff, it's better for their bottom line. I don't know about other people out there, but I'd like to see the suppliers I buy from stay in business.

And related to the topic of transparency, I am interested in helping out other artists learn new skills. I'd like to think that the jewelry I create (my style if you will) goes beyond the list of components I use. I do plan on posting some tutorials at some point here, expanding on the few tips and tricks I've posted in the past.

Note: Yes the photo is old, from earrings I made back in January. This happened to be a relevant image that I already had uploaded (lunchtime blogging). The big loops I made with wire from my local bead store (20 gauge copper), the copper bicone beads are from Rings and Things, and the topaz cracked Czech glass beads and Swarovski crystals are from Artbeads.

Friday, March 26, 2010

Found the Jump Ring Inspiration

Just a short post before company comes over tonight. I mainly wanted to share the inspiration for trying a chainmaille bezel with one of my new cabochons.

Polka dot by night Earrings (Over in the Rings and Things Gallery), use Swarovski rivoli stones. The jump rings used in this design catch the facets quite nicely. Now my cabs lack said facets, so I'll have to experiment with different weaves to hold them well. I'm thinking of European 4 in 1 with smaller rings. I'll keep my blog updated on the progress/attempts.

Wednesday, March 24, 2010

DIY Polyclay Cabochons

So, last week I was glancing over at my clay bin which was on the dinning table, and noticed my little plastic palette sitting next to it. I had one of those light bulb flashing idea moments, thinking how much the little wells of the palette are shaped like a round cabochon (aka "cabs"). I hadn't even been planning on working with clay that night, but the idea was exciting enough that I had to set up a little work area at the table and start rolling the clay.

Yes, I took photos when I was done, so these are all finished. Here is my pallet with the cabs on/around it, along with a US nickle for size comparison. (how handy).


The next image shows all three cabs along with the nickle. Two I made with the same marbling technique where I twisted ropes of clay together several times. This made for the larger more prominent color pattern. The third cab I rolled the clay first into thin sheets and then rolled the sheets together and twisted from there. That's why the third cab has a very subtle color pattern to it.


Another shot of the rope twisted cabs. The smaller one was left over marbled clay after I molded the first one. It wasn't quite enough clay to fill the well, but it ended up round enough for this trial run.


So what's next? Why bezels of course. I want to try a bead stitched bezel on one, and also try doing something with chainmaille on another. Depending how that works I'll figure out what to do with the third. I may even just buy a glue on bail.

Tuesday, March 23, 2010

Teaser Post

Yes, I had fun with my polymer clay tonight. I made some cabochons last week, and finally got around to baking them. Once they cooled I then applied some glaze, which I may do a second coat tomorrow. Now I'm thinking of ideas for bezels, I do want to practice a bead stitch bezel and maybe something with jump rings. (I saw an example of a jump ring bezel in the Rings and Things catalog).

Pictures to come soon. (Yes, hence the teaser).

New Storage Container

Long time no post. I swear, various tech devices talk to each other, first the camera was acting up, and now it's my computer. (Though old camera was old and well used).

Anyways I wanted to write up a quick post to show one of my new storage containers. It's the 52 compartment Beadalon®, Bead Organizer. I took these photos almost 2 weeks ago when I had the camera out to take pictures of the cats. I have since added more beads and rings to this container. I'm actually thinking of getting a second one of these so my jump rings have their own container (I do some chainmaille).

This shot shows what I had in here as I started to put beads into the container. The one side is seed beads, and the other is findings and miscellaneous beads. My 3mm copper bicones are in there.


Here's a close up of the front left of the container. The smallest of the inner containers hold size 11 seed beads, while the ones behind them hold size 8. Farther back (outside of the frame of this image) I have size 6 (E) seed beads.

Sunday, March 7, 2010

Storage in Progress

Last weekend I wrote about not having much luck finding a specific type of storage container for my beads. This picture shows the storage container that I'm looking for, with the smaller bead containers inside of it. I now have more beads then will fit in here which is why I was looking. (I ended up buying 2 bead storage/travel cases from Rings and Things Monday, which should be here soon).

There are three sizes of bead containers inside the storage bin, as seen in this picture. I've been buying these locally at Joanne's getting some of each size. The largest ones have 4 storage compartments, the medium have 5, and the small have 6. In general I use the smallest (6) for my seed beads, even up to size 6 seed (E) beads will fit depending on the quantity I've purchased. The medium are good for a larger quantity of seed beads along with some of the stone chips and medium beads. I have some 6 and 8mm rounds in these sizes. When buying 10mm beads the large containers work best, especially with a strand of cat's eye beads.

What is nice about these bead containers is the ability to open only the individual compartments for the beads I want to use. This is the large container here, with the pink cat's eye beads open. The other half of the container still has the lid on, which is handy to help avoid bead spills.


What one of the containers looks like with all the individual compartments separated. This is one of the medium containers with some stone chips, 8mm resin rounds, and a few random beads in the bottom one. The lid can be seen in the foreground of this photograph.

Some of the newer style of these containers come with a second lid, so that the stacks can be halved and still sealed. Which can be handy for a smaller storage space.


When I first started putting my beads in this storage system I had less supplies than I do now. I noticed that the Beadalon spools of stringing wire are a slight bit smaller in diameter then the large containers are. With the large containers being a slight bit shorter than the other containers, I could fit 2 spools of Beadalon on top of the large bead container and still close the lid on my storage bin. Though now with my larger supply I actually have my bead stringing wire in recycled plastic soup containers from the local grocery store. The soup containers are just a little wider than the Beadalon spools. I also have some Soft Flex, which those spools fit inside the backs of the Beadalon spools saving me a bit of space.


And this is my "to sort" storage bin. I've been tossing random beads and other craft supplies in here along with some other stuff. This is in addition to various plastic bags of beads and findings I have to store better. There is a finished necklace in this bin, along with a bracelet someone gave me which I need to fix the clasp on. There is also some sea glass and shells. I think the sea glass is store bought, rather than stuff I found. (Somewhere I have some pieces of sea glass I picked up from the shores of Lake Erie).

Saturday, February 27, 2010

Storage Woes

Because my one bead container can hold no more of the round stack-able bead containers I decided to buy another container. As mentioned awhile back, I like the Sterilite show-off storage containers. The clips are secure, and there is one central handle in the lid for ease of carrying. Plus to their #1894 show-off is the perfect size for my bead containers height wise, with just a bit of extra room on top for a few plastic bags of purchases to be sorted.

Over the past 2 weeks I've stopped in a few different Target stores as I've been out. Each one I've had little luck finding any of the show-offs. They've had other Sterilite products in their stores, but not the specific style I'm looking for.

These are the show-offs which unfortunately the company doesn't sell directly. I've even checked Target's website, but they only have one Show-off, one to large for what I'm looking for. I even stopped over to Joann's website, which doesn't have to many show-offs either. I may have to stop in their store sometime, and can check then. I'm planning on buying more of the stack-able bead containers anyways. Rings and Things does have some of the stack-able containers, but only one size. I've found I like having the three different sizes for my different beads. Though I may add some to my cart the next time I'm buying other stuff from them. (It'll be interesting to see the threads on them, the ones I've been buying got redesigned at one point and have wider more stable threads).

Pretty much what it comes down to is when I store my beads I want something to put smaller containers in. Most of the bead storage stuff out there are the kind that the lid opens all the little bead pockets at once. Sure that's fine for some beads and findings, but I have way to many seed beads for something like that. Which is why I like the stack-able containers, only the beads I am currently using are open. Even for my larger (8 to 10mm) beads I like the stack-ables for. And it's also nice that I don't have each type of bead in it's own container flying around a bigger storage thing.

I'll say, storing my beads was so much easier when I didn't have so many.

Update 10:56 PM Eastern time
Because I'm to tired for a full new blog post. I just wanted to add that I chose two of the storage cases from Rings and Things and ordered them this afternoon. I chose ground shipping to save money over air, so it'll take longer then the usual 2 days of Priority Mail.

Saturday, February 20, 2010

New Camera!

My husband and I got a new camera, to replace the previous one which is pretty much shot. The light sensor isn't functioning, and the model is old enough that Olympus doesn't carry parts to fix it anymore. That's alright, we'd gotten plenty of use out of the old camera.

To celebrate the new camera, I decided to enter the "Your Designs Rock" contest over at Rings and Things. I sketched out a design earlier this month, then ordered parts from R&T the other week. Thursday I finished the necklace and earrings and will be working on submitting the pictures to the contest. I had been tempted to enter earlier, but with the camera issue I wasn't sure.

Showing off what the new camera can do:

Now this isn't the piece I'm entering in the contest. I am going to wait to show it off until later. This necklace I made back in October with beads I bought with birthday money. The lovely agate stone I picked up from my local bead store. I also made matching earrings, which I didn't take pictures of yet.

The light wasn't the best today as it's a bit overcast, but the pictures for the contest turned out well. This particular necklace didn't do to bad considering it has quite a bit of dark purple in it. As we get more settled into the house I do want to set up a light box for my jewerly pictures to decrease my dependency on sunlight. (It's now light out when I get home from work during the week, but the sun is low enough that I'm still waiting for weekends to get decent light).

Here's a close up of the stone with the second strand above it. I used silver colored copper wire to hang the stone on and did a coil at the bottom. For this shot I hung the necklace on the display stand I made this morning. I cut apart a cardboard box then covered it with some printer paper. My contest necklace has enough little hanging pieces that it photographed better not laying flat.

The only editing I did with these images was cropping and resizing.

Sunday, January 31, 2010

Camera Fail

So I finally got around to getting the camera out, to take some nicer pictures of my newest pieces of jewelry, and didn't have much luck. My cell phone does have a camera feature, but it's not quite as nice as an actual camera.

But this is what I got instead. Even in this small thumbnail version the washed out colors are obvious. On the regular sized (click said thumbnail) pixels around the edges can be seen. I did have problems with the pixels the last time I used the camera, but the colors weren't nearly this bad.

I didn't adjust the image at all, this is directly from the camera and uploaded.

This is what it did to the great outdoors. We do have snow, so the ground is white, but the rest of the image shouldn't be those colors. I did take that image through the glass, which I've done before without this issue.

This (DeviantArt link) is how the camera normally takes pictures, I took this picture back in May. Again, there is no adjusting on the computer.

I tried various flash settings, with letting the camera decide to use it, to forcing the flash, and I got the same results.

Thursday, January 28, 2010

Have Pin Vise...

I've been using the pin vise I bought back in December from Rings and Things, and it's quite the handy tool. I'm working on a few things at once with it.

This is one of the projects I'm working on, a purple and copper necklace. I used 22 gauge copper wire for the pendant and rings, all cut from the same length of twisted wires. I used two lengths of the purple wire and one of the copper color. For the twisting I had my nylon jaw pliers on one end, and the pin vise on the other. Once the wire was twisted I used my round nose pliers to shape the little rings and the pendant.

The next work in progress is inspired by one of the stories from Catherynne Valente's Omikuji Project, The Apple Tree at the End of the World.

I also used 22 gauge copper wire for this, twisting three strands together with the pin vise for the smaller branches. Where the smaller branches form the limb, I hand twisted them together. I twisted the smaller branches together first, then added the apples and the leaves. One apple is 8mm while the other is 6, I figured that would help give the finished tree some perspective.

I still have yet to make more branches, and once I have the tree all assembled I'll work on shaping the branches and limbs more.

The third pin vise project has no pictures. Tonight and last night I've been doing some work with 20 gauge copper wire for earrings. Using two strands (one gold color, one copper) twisted together I've made some loops, which I'll hang some beads in the center of. It was a little tricky to get the 20g wire into the vise, but still possible.

For the twisting, I found that the nylon jaw pliers work well with the pin vise. I first secured the ends into the vise. Then I slid the pliers down the wires to make sure they were even against each other. The next step was to clamp down on the ends in the jaws of the pliers. I also found that it helps to bend the wires over the far side of the pliers jaws, in a nice right angle. When I first was twisting wires together, they slid around in the pliers. Bending them helped keep them in place.

Sunday, January 17, 2010

Chainmaille Set

Well, long time no post. Now that the holidays are over and I'm getting back into my usual routine here is something I've recently made. I started working on this set back in December, between Christmas gifts for friends and family. The choker is 14 inches long, with a bit of an extender chain built in, and the earrings are about an inch or so long.

The weave on these is European 4 in 1, which is a standard maille weave. The double colored diamond pattern I found in a beading magazine I picked up two summers ago. I'm not sure of the ring sizes they had recommended, I ended up picking out sizes and colors at my local bead store that I figured would work well. I've done this pattern before with these size rings, and I've had good luck. These rings work especially well with the earrings. When making a bracelet with larger rings, a single diamond unit felt a bit to heavy to be an earring, but these ones are light weight enough.


Here are the earrings, the same rings as I used with the choker. The earring findings I've had awhile now, and they happened to go well with the rings.

For the rings, I used D20 EC. The AR is 4, D is 1/8 of an inch, and they are made out of 20 gauge wire. They aren't labeled as to what metal they are made out of, but they look like aluminum (I cut one in half, it's not copper, and to soft to be steel).

As I unpack from moving and find the magazine I'll post the details for that issue so others can find the pattern. (Not that it's that complicated). The trick to the diamonds is to have the last row of rings facing the same way as the first row in the next diamond. That way they are less likely to twist around. I'm not counting the single connector ring as a row here.